Basic Cisco Tasks – Configure TFTP settings
These tasks were performed on Cisco ASA firewalls.
I try to underline any syntax in this tutorial to make it easier to identify, copy, modify (if needed) and paste directly into your device. I always recommend taking your own notes for future reference since configs will vary.
If you like Cisco documentation on this (which I find a bit cumbersome and difficult to find my answers from at times) you can check it out HERE
Configuring the default TFTP provides the default information needed by the ASA device to easily copy files to and from a TFTP server. The TFTP program that I have installed on another machine on my network is called TFTPD32 which is opensource and can be downloaded from http://tftpd32.jounin.net/
This task was performed on an ASA 5505.
Login using your account and then enter enable mode by typing “ena” and entering your enable password.
When you initially login your prompt will look like:
ASAHostName>
When you are in enable mode the prompt will look like:
ASAHostName#
Now for configuring the TFTP server
After in enable mode type:
configure terminal OR you can abbreviate with conf t
Your prompt will now show:
ASAHostName(config)#
Now type the following
tftp inside xxx.xxx.xxx.xxx /
A simple way to break down what this command is doing is the following
tftp | interface (inside or outside) | IP Address | path to copy to on that server.
In the illustration below / refers to the root of the current directory. In this example when I copy a file to the TFTP server it will be copied to the c:\Program Files\Tftpd32 folder on my machine running TFTPD32.

Now type quit OR exit to exit the configuring of the terminal.
Lastly, save your changes to the startup config after you test it by typing “wr OR write memory”
Now when I run:
copy run tftp OR copy running-config tftp (the first one is just abbreviated and shortened but works the same)
ASAHostName# copy run tftp
Source filename [running-config]? (I just press enter here since this is the file that I want to copy)
Address or name of remote host [192.168.1.199]? (I press enter again since this is the IP that I’m using for my TFTP server)
Destination filename []? running-config-O1-1-27-14 (I added a distinct identifier of -O1-1-27-14 O1 for office 1 and the date. I do this because I have multiple devices that I login to. Do what’s easiest for you to remember.)
Cryptochecksum: cxxxxxx9 1337n355 9d17a0c4 b48a5438
!!!!
14626 bytes copied in 1.400 secs (14626 bytes/sec)
ASAHostName#
Now when I remote to my TFTP server and browse to the c:\Program Files\Tftpd32 folder I will see the file that I copied via TFTP from the ASA.
Now to copy a file from the TFTP to your ASA can be done by typing:
copy tftp flash OR copy tftp disk0 (which both refer to the point of its internal flash memory.)
To see all the options of copying from your TFTP type:
copy tftp ?
This will show you your options like:
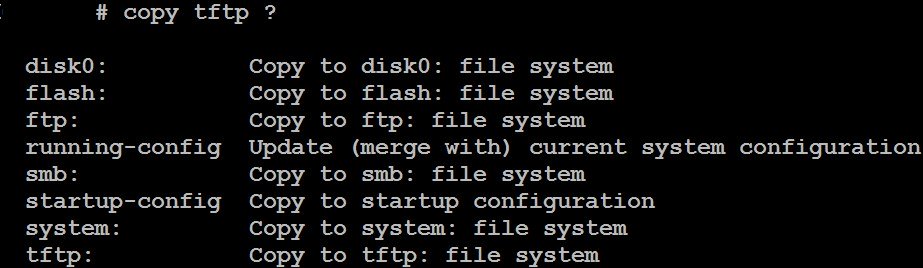
Simply follow the prompts like before to copy the opposite direction.
Now to configure this via the ASDM interface. This was performed with the following software running:
![]()
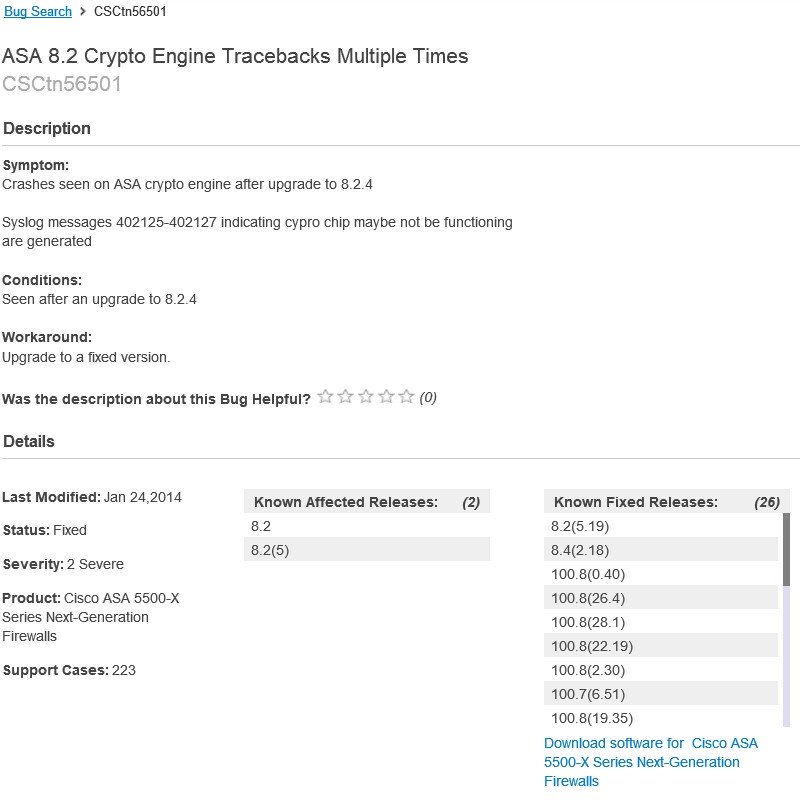
The version 8.2(5) does have a bug in it however does not effect this functionality.
https://tools.cisco.com/bugsearch/bug/CSCtn56501
If you do not have a cisco account below is a screenshot of the page:
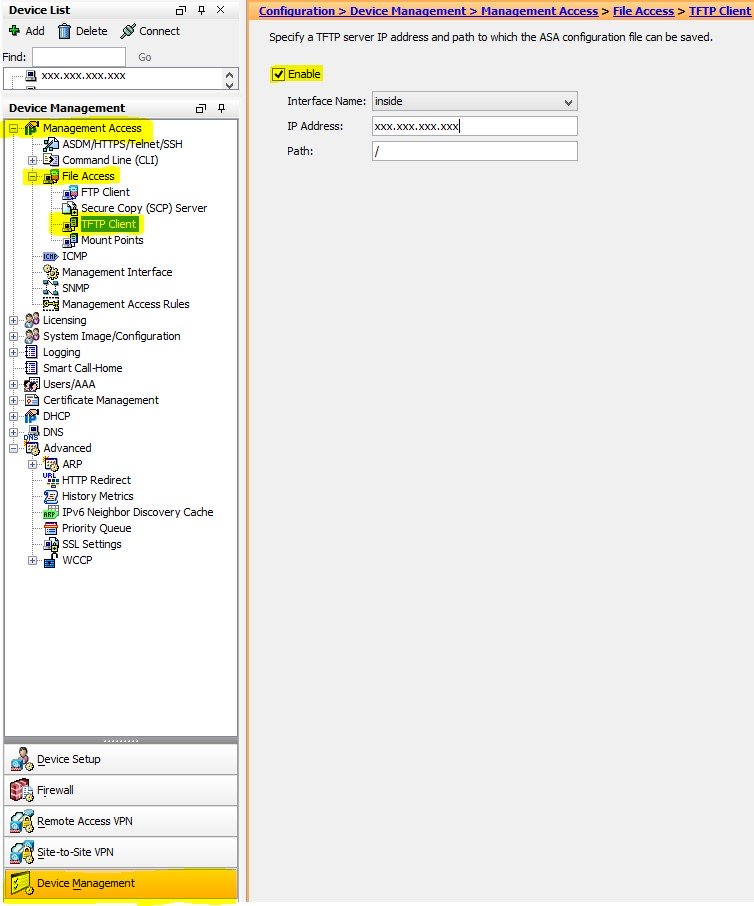
Login to your device, click on configuration and follow the yellow click road (click your way through based on the yellow highlights that I’ve highlighted below.) Make sure that it’s enabled and give it the ip address of your TFTP server. Click apply so that ASDM executes the commands, then test it and write it to the startup config by clicking the save button![]() you have now completed Basic Cisco Tasks – Configure TFTP settings
you have now completed Basic Cisco Tasks – Configure TFTP settings