debugging breakpoints
One of the daily routines for every developer is debugging. As many developers already know it can be a very difficult, and some times even more annoying of a process. It often require code changes just to find the bug, adding debug/trace lines, assertions and God knows what else. At the end when bug is fixed, we have to review it again and clean up the mess that we have created during the debugging process.
Although debugging breakpoints can be really tough, Visual Studio has some tricks to make it little bit easier. I will try to make several short articles to show you some of the tips and tricks of how to debug easier.
First I will start with the basics – Break Points.
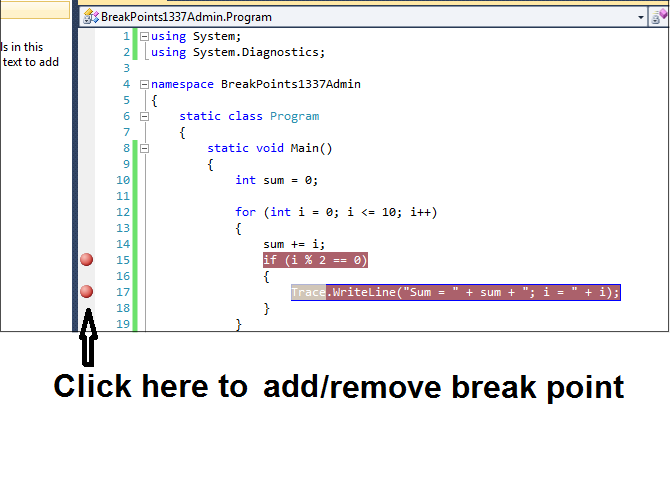
We can put a Break Point into the code where we think there might be a problem. The easiest way of placing break point is by clicking in the side bar of the text editor, in the line where the problem might be. A red filled circle will be placed there, indicating that our break point has been placed successfully.
Of course we can’t place break points everywhere. It is obvious not to be able to put break point outside of a class, because C# is a object oriented language and entire code has to be placed inside a class. Also, we can’t put break points in the line where our try keyword is. If we try to add a break point there, it will be added in the line where its catch statement is instead; if we have catch at all. If we only have finally, then no break point will be added. Also, another thing that is very obvious is not to be able to add a break point in an empty or commented line, because it will be of no use anyway.
try // break point can't be added in the try line

{

//comment - you can't add break point in commented line

//todo: here is our code

}

catch // this is where try break point will be created

{

//exception handling

}
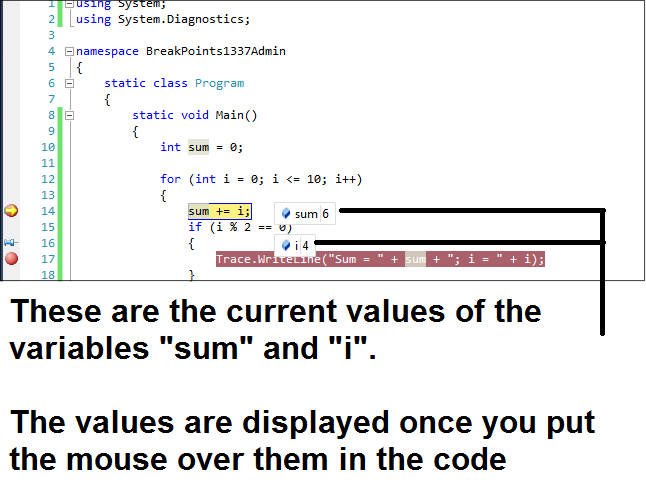
Once we run the code (hit F5) the execution will stop at the break point. This break point will allow us to inspect the values of the variables that are currently in the scope, and hopefully it will help us to find the bug, or the reason why some variable has value that we don’t want it to have. You can remove break points in the same way as you have added them, by clicking on it.
The article is very basic, but hopefully it will be helpful to beginners with their first debugging experience. More detailed articles about break points are coming soon.
Pingback: debugging breakpoints (part 2)